How to fix iTunes could not connect to the iPhone issue
To use iTunes, you must have the app downloaded on your device. Since the most probable cause of this error is an incompatibility issue, the iTunes app version should be compatible with the iOS version on your device. Listed below are the various methods to fix invalid response received by iTunes.
How to fix iTunes could not connect to the iPhone issue Method 1: Basic Troubleshooting Method 2: Update iTunes Method 3: Reinstall iTunes Method 4: Update iPhone Method 5: Delete Apple Lockdown Folder Method 6: Check Date & Time Settings Method 7: Contact Apple Support
Method 1: Basic Troubleshooting
When you get the error: iTunes could not connect to the iPhone or iPad because incorrect response received from the user, it might be due to an improper USB link between iTunes and your iPhone or iPad. The connection may get hampered due to defective cable/port or system errors. Let us look at some basic troubleshooting fixes:
Restart both devices viz your iPhone and your desktop. Minor glitches usually disappear by simple rebooting.
Make sure that your USB port is operational. Connect to a different port and check.
Ensure the USB cable isn’t damaged or defective. Connect the iPhone using a different USB cable and check if the device is recognized.
Unlock your iOS device as a locked iPhone/iPad may cause connection issues.
Close iTunes completely and then, restart it.
Uninstall third-party applications which are interfering with the said connection.
In rare cases, the issue is triggered by iPhone network settings. To resolve this, reset network settings as: (i) Go to Settings > General > Reset, as shown.
(ii) Here, tap Reset Network Settings.
Method 2: Update iTunes
As informed earlier, the major concern is version compatibility. Hence, it is advisable to upgrade the hardware and all applications involved. So, let’s begin by updating the iTunes app to the latest version. On Windows systems:
First, launch Apple Software Update by searching for it, as illustrated.
Click Run as administrator, to open it with administrative privileges.
All newly available updates from Apple will be visible here.
Click on Install to install the available updates, if any. On Mac computer:
Launch iTunes.
Click on iTunes > Check for Updates located at the top of the screen. Refer given pic.
Click Install if a new version is available. Also Read: Fix Windows 10 Not Recognizing iPhone
Method 3: Reinstall iTunes
If updating iTunes did not resolve the issue, you could try uninstalling and reinstalling the iTunes app instead. The instructions for it are listed below: On Windows systems:
Launch Apps & Features by searching for it in the Windows search bar.
In the Programs & Features window, find iTunes.
Right-click on it and then click Uninstall to delete it from your computer.
Restart your system.
Now, download the iTunes app from here and install it again. On Mac computer:
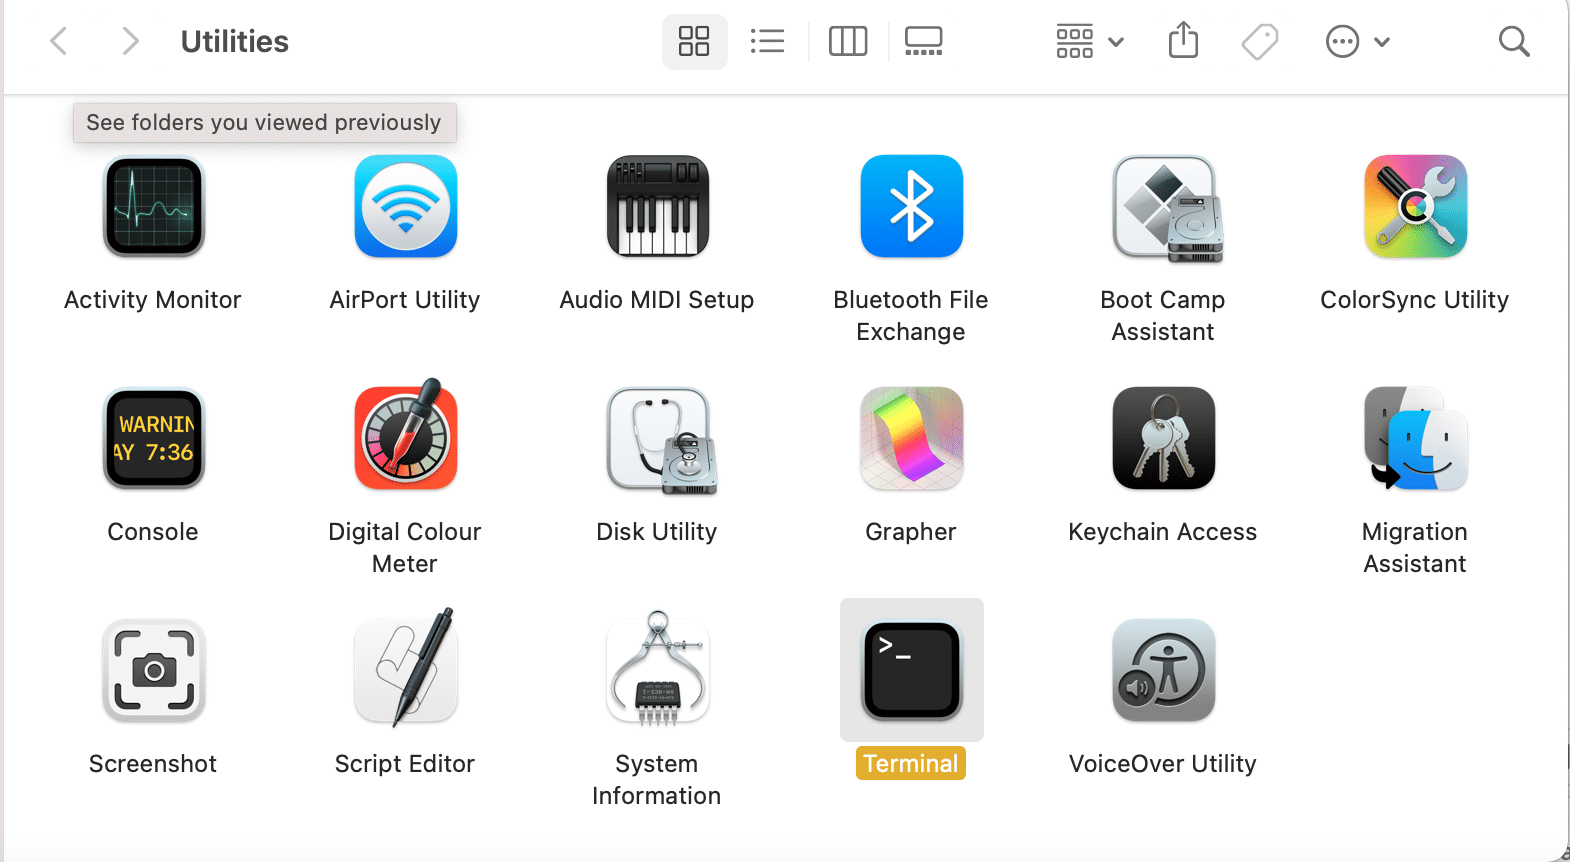
Click Terminal from Utilities, as shown below.
Type cd /Applications/ and hit Enter.
Next, type sudo rm -rf iTunes.app/ and press the Enter key.
Now, type Admin password when prompted.
For your MacPC, click here to download iTunes. Check if iTunes could not connect to the iPhone because an invalid response received is resolved. If not, try the next fix. Also Read: How to Copy Playlists to iPhone, iPad, or iPod
Method 4: Update iPhone
Since the most recent version of iTunes will be compatible only with specific iOS, upgrading your iPhone to the latest iOS version should resolve this problem. Here’s how to do so:
Unlock your iPhone
Go to device Settings
Tap on General, as shown.
Tap on the Software update, as shown below.
If you see an update for your device, tap on Download and Install to upgrade to the latest iOS version.
Type in your passcode when prompted.
Lastly, tap on Agree. Reconnect your iPhone to your computer and verify that the Invalid Response Received error has been rectified.
Method 5: Delete Apple Lockdown Folder
Note: Log in as the Administrator to remove the Apple Lockdown folder. On Windows XP/7/8/10 systems:
Type %ProgramData% in the Windows search box and hit Enter.
Double-click on the Apple Folder to open it.
Locate and Delete the Lockdown folder. Note: It is not necessary to remove the lockdown folder itself but the files stored in it. On Mac computer:
Click on Go and then Go to Folder from Finder, as depicted.
Type in /var/db/lockdown and hit Enter.
Here, click on View as Icons to view all the files
Select all and Delete them. Also Read: How to Fix iPhone Frozen or Locked Up
Method 6: Check Date & Time Settings
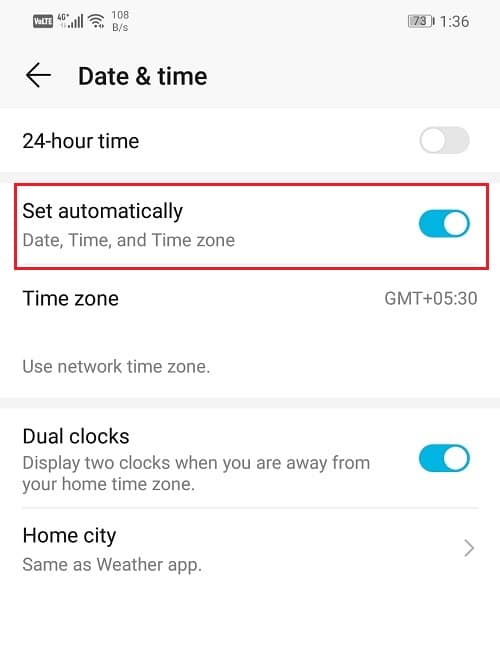
This is crucial because an incorrect setting of date and time will throw the computer or your device out of sync. This will result in the iTunes invalid response received from the device issue. You can set the correct date & time on your device as explained below: On iPhone/iPad:
Open the Settings app.
Tap on General, as depicted.
Tap on Date & Time.
Toggle ON Set Automatically.
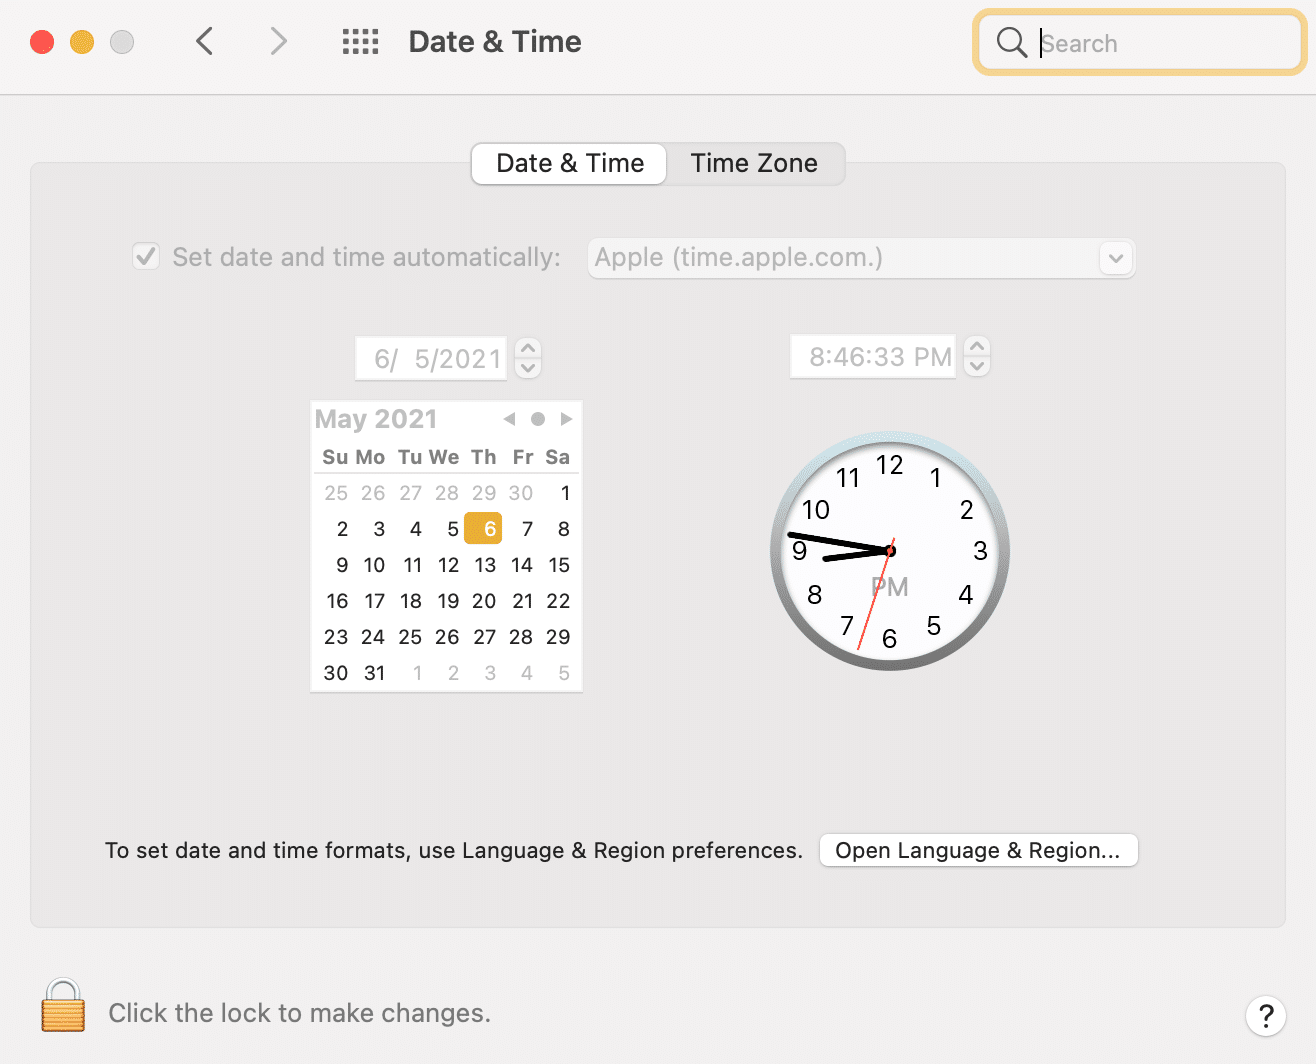
On Mac computer:
Click Apple Menu > System Preferences.
Click Date & Time, as depicted.
Click on the Set date and time automatically option. Note: Select Time Zone before choosing the said option.
On Windows systems: You can check the date and time on the bottom right corner of the screen. To change it,
Right-click on Date and Time displayed in the taskbar.
Select Adjust date/time option from the list.
Click on Change to set the correct date and time.
Turn ON the toggle for Set time automatically and Set time zone automatically for automatic syncing hereon.
Method 7: Contact Apple Support
If you are still not able to fix unable to fix Invalid Response Received iTunes issue, you need to contact Apple Support Team or visit the nearest Apple Care.
Recommended:
How to Add Fonts to Word Mac Fix The file iTunes Library.itl cannot be read How to Fix Apple CarPlay Not Working Fix A Device Attached to the System is Not Functioning
We hope this article assisted you in resolving the iTunes invalid response received from the device problem. If you have any queries or suggestions, leave them in the comment section below.